Nice progress Donny!
You are using an out of date browser. It may not display this or other websites correctly.
You should upgrade or use an alternative browser.
You should upgrade or use an alternative browser.
Donny's 1970 300
- Thread starter Donny
- Start date
monaco75
Senior Member
Donny, where did your leaf springs come from, if you don't mind me asking??
Donny
Member
Those are stock, except the local spring shop I took them too for refurbishing added a leaf in the middle and re-arched the rest. I didn't ask for another leaf, he put it in and told me later. Oh well!
I'm in need of some guidance. My lane is Media Blasting and metalwork, and what I'm messing with is far outside my lane. I've had (by my proof in the video) a terrible running engine. I've found and closed all vacuum leaks. The guy who helped me get it wired right set the timing with these air leaks everywhere (mainly the Edlebrock 1407 Carb has a 5/8 plug hole in the back of the carb which was 'open') letting massive air in and out, which, being open swamped the other adjustments, so, as I plug up and find errors the motor starts to run like doo-doo.
I had my helper remove the Carb, and clean it really well (thought it may be bad gas), but, I think he didn't do so great a job as I went back through it today and found the floats had been mashed down and one top plate screw not screwed in at all. So, I took it off and apart myself looking for errors to correct. Yup, needed a new top plate gasket, go to AZ and of course the only thing they have is a rebuild kit for these carbs, so, why not, do it right, right?
Get back to shop and install all the parts and rebuild stuff, and realize that this wasn't the issue, it's timing! So, I hook up the vacuum advance (it never was hooked up when I had help getting it running) so, it won't start unless the gas is nearly all the way down, then it runs like crap. So, I need to know about timing, and setting it at idle and mechanical advance then allowing it to set and also I set it to vacuum advance timing. I'm really a rooking in this lane, but, I need to sort this out tomorrow and get the ready for more jobs next week.
It's got the Mopar perf distributor, no points, if this is needed to know. Thanks ya'll!
- Joined
- Nov 14, 2010
- Messages
- 28,160
- Reaction score
- 27,330
So you have or haven't set the timing? If you haven't I would remove the number 1 plug and turn the engine over without the key on to get it to TDC on the compression stroke. As the woosh of air is pressing against your finger over that #1 hole is happening, stop the cranking and finish bumping it to TDC with a visual of the mark on the vibration damper. Then locate the number 1 tower on the dist cap with it still on the distributor. Use a sharpie to mark the body of the distributor just below the centerline of that tower, remove the cap and see if the rotor is positioned where it should be. Then report back.
Donny
Member
I know, I thought about this last night, timing was set, but, it was set with a lot of vacuum leaks, and with no vacuum advance hooked up. When I plugged up the vacuum leaks and put the advance on, it starts only when gas is half was pressed down, and then runs crappy. So, as I said I thought about this last night...today, as you indicated Matt, TDC on #1, make sure rotor is on #1 wire, then start with no vacuum advance and start timing it from there. As I said, this is I know basic stuff, but, I never need to mess with this lane! lol
- Joined
- Nov 14, 2010
- Messages
- 28,160
- Reaction score
- 27,330
Check to see that your choke is operating properly next.
Donny
Member
Donny
Member
Ok, got the timing issues sorted out, and the carb off and cleaned up, car fires up instantly, every time. Got the left bank exhaust pipe system made and installed and the bad muffler issue sorted, so, it sounds absolutely fabulous, and stock! Got the donor Hood off, and the two replacement donor Fenders off too, got the Fenders media blasted and primed, the Hood is a big piece of real estate, and it serves as a back stop to my table when I conduct media blasting operations. This way I do paying jobs and get my own personal stuff done at the same time; two for one deal.
I informed my wife -- notice I didn't ask -- that this car is coming home to reside in the garage for the next few months, we have a 3 car garage with motorcycles and a Camaro in it, just a little re-organizing and it'll fit in. I am literally running out of room in my shop! Here's a few pics taken over the past few weeks.
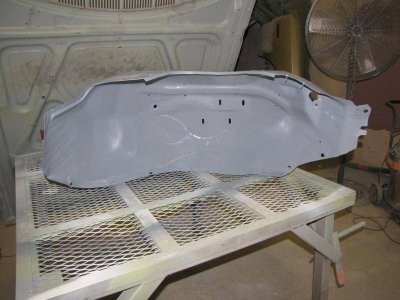
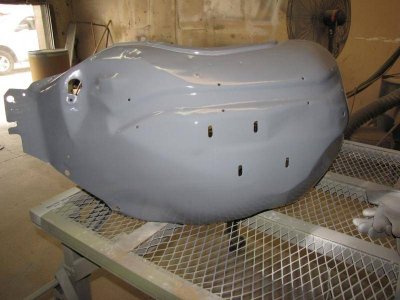
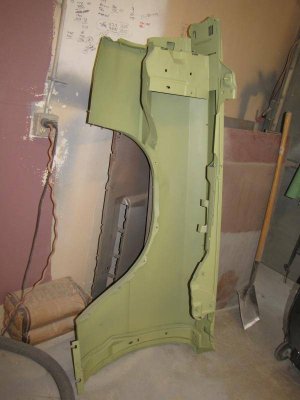
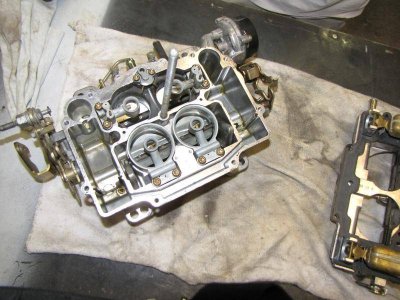
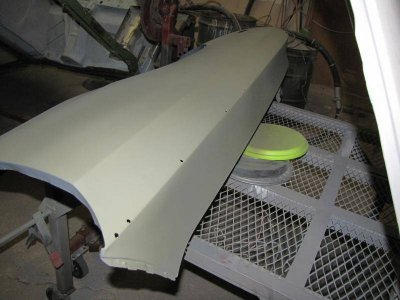
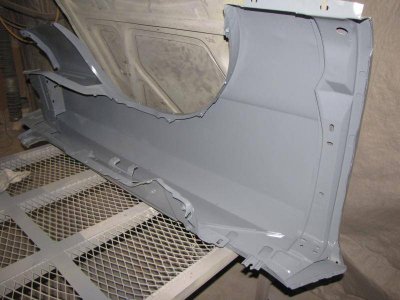
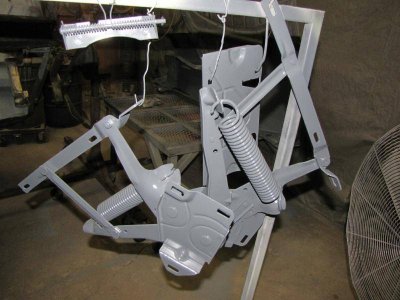


I informed my wife -- notice I didn't ask -- that this car is coming home to reside in the garage for the next few months, we have a 3 car garage with motorcycles and a Camaro in it, just a little re-organizing and it'll fit in. I am literally running out of room in my shop! Here's a few pics taken over the past few weeks.


Donny
Member
Last edited by a moderator:
Donny
Member
The painted wants the Fenders in Etch primer, on one Fender the inner portion I epoxied. The actual Inner Fenders I also epoxy primed (the gray color is Epoxy). One of the pics you'll see a Hood, that's this car's Hood.
Great job getting that 440 dialed in. I know that feeling of accomplishment when you can get tehm running well after a spell of running so bad you wonder if it'll ever be right. Well done!
As for how hot it seems, use the guage as your guide. If it's toward the cool side of the middle range you're good.
As for how hot it seems, use the guage as your guide. If it's toward the cool side of the middle range you're good.
Donny
Member
Well, the Hood and Fenders I did a bit of trading with a guy who does moonlighting out of his garage, he works for musclerodshop during the day and Volvo's at night...yeah, interesting! Well, I blasted a bunch of his Volvo stuff, he Blocked and Sanded my Fenders and Hood, not all the way mind you, I guess he got tired of the stuff, but, they are straight, and ready for further blocking and sanding which I have not done -- yet! Also, a body shop across the street does a lot of side and high end repair jobs, and they send stuff to me needing blasting often, got a deal worked out for 2.5 gallons of the EF8 Sherwin Williams paint (should be enough for full coverage). Also, the upholstery shop next door classiccustomupholstery.com and I also have a deal, they send me GM seat frames all the time that are broken, I repair them. I also blast seat frames on their high-end jobs, and other stuff they need done, at no charge for them, which will equate to them re-upholstering my Seats for the 300. They've already ordered and have the material. The inner green inserts we could not find the right color material, and when I said that looks good enough they said No, it won't look right, so, I trust their judgements, and they said they will re-use the inner inserts, enhance and build the foam where it's worn out. So, this is slow, but...there is progress where funding is going to other things at the same time. Pretty soon I will have this 70 300 and my 69 Satellite coming on line and into the driving category at once! With my 70 Challenger and 69 GTX behind them! Hard to beleive I couldn't find any good and clear shots of the Seats! I will fix that today, and post some up later. Here's the best one I could find of the seats.
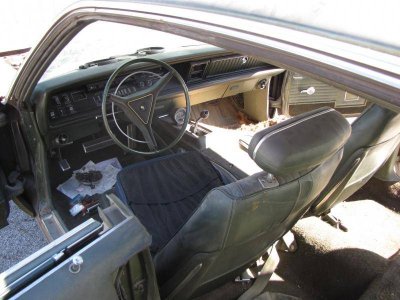


commando1
Old Man with a Hat
Sounds like a great neighborhood to be in. Im envious.
Donny
Member
It is! I'm literally right where I need to be!
Wollfen
Old Man with a Hat
Welcome back Donny, its been a long time. Glad to see there is progress on the beast too!
Donny
Member
Thanks. I get busy with work and stuff. I think C body's needs some more attention!
Donny
Member
Finally! Getting the car and it's parts into new EF8! First batch getting mixed up now!

commando1
Old Man with a Hat
Orange with black polka dots?Finally! Getting the car and it's parts into new EF8! First batch getting mixed up now! View attachment 71081
mr. fix it
Old Man with a Hat
looks more like the face of a planet that had an asteroid crash into it... or a pumpkin crammed into a can..Orange with black polka dots?
Take your pick..
Similar threads
- Replies
- 5
- Views
- 697
- Replies
- 1
- Views
- 941


