My new `67 Imperial Crown Coupe!

Hey gents.
I haven't decided for sure if I want to take the receiver off but I probably will. It doesn't bother me as much as the tips did. The designers at Chrysler did a fine job on the rear of this car and those tips were just a bad distraction. The `71 R/T is almost done and at this point we are losing valueable time in the premium selling season. Not to mention we have a lot of money wrapped up in it!
 
It's a beautiful car, what are you going to ask for it? Do you have a before picture?
 
It's a beautiful car, what are you going to ask for it? Do you have a before picture?

We've only discussed it between the 3 of us and still need to have that meeting where we figure out what we have in to the car. We have all been keeping an eye out for comps and when they come up they have been for some pretty large numbers. Too soon to say.
I have some pics of when we bought it but it was already wearing paint by that time and the assembly was started. We ended up freshening up the underside and replaced everything from front to back including all suspension parts, all fuel delivery parts including the tank and all the brake lines along with a full strip and detail.
I looked at the car before the resto was started and had some pics, even posted on FBBO so it would be in the archives over there. This was a very solid car to begin with, no frame repair and the floors were all rock solid.
 
Last edited:
Now seeing as how I can't stop touching the Imperial, half way through a full paint cleaning, polish and wax which I am doing section at a time during these beautiful evenings we have been having. I keep making new little discoveries. for example I knew it had a spare but hadn't taken the time to remove the original carpeted cover until yesterday and what else should I see but the original! Yellow grease pencil marks and triple white wall stipes on it. Like I said, keeps getting better and better!

IMG_8329.jpg


IMG_8330.jpg
 
Started having some fuel delivery issues and assumed it was just the pump was failing from non use over the last 4 or 5 years. I happened to have an extra so I just put it on and it did help for a couple of miles of my test spin. It also has on it one of those nifty clear fuel filters up by the carb so i could see that the level of fuel came up inside the filter considerably with the new pump at first. On my way back the car started to act again as if it were starving for fuel and the next assumption was that my problem was with sediment in the tank. I was planning on pulling the sending unit out anyway to see if I could diagnose my fuel gauge problem so I got to work. Unfortunately and fortunately I had just filled the tank before the issues started so when I began to remove the sending unit out came the fuel. I knew that was coming so I had taken some clean pans under with me to catch the fuel. I ended up draining off almost 5 gallons before I jacked up the front of the car to make the slow trickle at that point stop. While pouring the fuel into a gas can I noticed a lot of rusty flakes floating around and figured that was the culprate. Sure enough, they were flakes of the magnetic type which is good because I figured that with a couple of strategically placed, strong magnets on the outside of the tank I could wrangle all of it and keep it from plugging the sock while the car is running. All that seems to be working good because the clear filter is now full of gas and the car was certainly running much richer. The magnets are a temporary fix at least until I burn enough fuel to drop the tank and properly address the issue. I did discover that the sending unit ribbon had come detached from the body of the sender so I repaired that and now the gauge reads past full but at least I know the gauge works and just have to figure out why it's pegged the other way. Seemed to be grounded quite well.
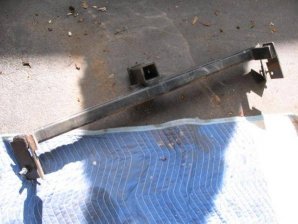
While I had the arss up in the air I figured I'd remove the hitch receiver. This Imperials towing days are over, that's what the 3/4 ton truck is for! Looks much better without it and lost 25 lbs in the process!IMG_8344.jpgIMG_8345.jpg

IMG_8345.jpg


IMG_8344.jpg
 
This weekend I'll install my new automatic parking brake release switch and hopefully finish the wax job! Oh yeah, and fix my dash lights and the power window motor I just installed!
 
Your Imp looks very clean now without that hitch. You mentioned in an earlier post that you were cleaning and waxing your car section by section. Could you share how you are conducting that process and what cleaners and wax you are using. It looks like you are completely and successfully removing all of that 40 year old oxidation.

:sSig_goodjob:
 
I will but later, I have to go make money!
 
I started out with a thorough hand wash and towel dry. A buddy of mine suggested I try a claybar on it first, so I got a kit from Mothers or Meguiars. It includes a bottle of a lubricant that you spray on in smallish sections at a time and then you simply rub the flatend piece of clay accross the paint, pulling the clay apart and kneeding it back together in between sections. I was impressed with it as the paint did feel less rough to the touch. For the next step I used Meguiars Ultimate Compound and a machine. This stuff really brightened things up! I could only do less then a 1/4 of the car at a time before washing out the pad because of how much dirt and oxidation was loading up in it. I finished off with liquid carnuba from Jax Wax, also upon recommendation from a friend and also applied with a machine. It's coming out great and I would recommend all of the products!
 
You do want to do this in the shade on a cool(temp) car.
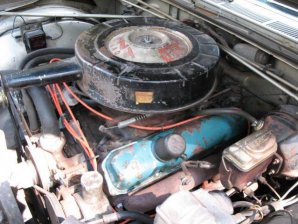
Well I fixed the rear window, it ended up being just a loose wire in the drivers door and in the process the drivers door window stopped working. It sounded as though the glass became free from the regulator, I'll have to deal with that today after work. I did replace the valve covers with a correct pair yesterday which my buddy included with the car. I was going to hold off till winter to do this but the passenger side started leaking on the manifold and I didn't want there to be a fire of course. I just cleaned the grease and grime off of them before installation as I didn't want them to look over-restored, here's how that turned out.IMG_8351.jpgIMG_8352.jpg

IMG_8352.jpg


IMG_8351.jpg
 
You do want to do this in the shade on a cool(temp) car.
Well I fixed the rear window, it ended up being just a loose wire in the drivers door and in the process the drivers door window stopped working. It sounded as though the glass became free from the regulator, I'll have to deal with that today after work. I did replace the valve covers with a correct pair yesterday which my buddy included with the car. I was going to hold off till winter to do this but the passenger side started leaking on the manifold and I didn't want there to be a fire of course. I just cleaned the grease and grime off of them before installation as I didn't want them to look over-restored, here's how that turned out.View attachment 3194View attachment 3193

Thanks for the tips. I've never used that clay bay before. It'll be interesting to see what it'll look like with 34 years of oxidation removed and a good wax job. I'll have to have some body work to get done eventually.

Your valve covers look great, Good Job!
 
Last edited:
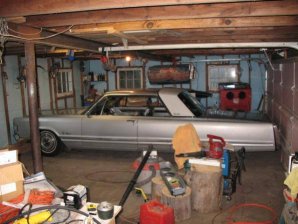
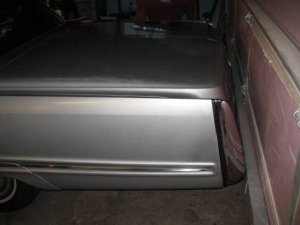
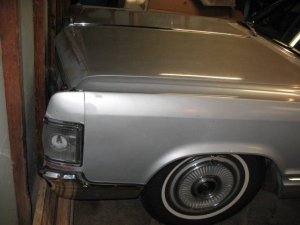
It actually does fit in the garage! JUST!IMG_8364.jpgIMG_8365.JPGIMG_8366.JPG

IMG_8364.jpg


IMG_8365.JPG


IMG_8366.JPG
 
Back
Top