Exact starter switch

Really... if this is the right switch and it's just a matter of switching connectors... You aren't hacking anything...

It's nice when stuff just fits.... but hey... these are old cars and the new parts aren't always exactly the same.

Be patient. If this was easy... everyone would have an old car.
Yeh, I know your right. There are somethings I don't mind not being original/aftermarket/unlike OEM, and there are others that I want exactly the same as OEM, like the electrical wiring. I'll do what I gotta do.
 
Gary buy a pin extraction tool. They are cheap as hell and are a lifesaver.
It will make slipping the pins out of the old connector into the new one a two minute swap.

$T2eC16h,!)QFIbwN8uIYBSOkejn)I!~~60_3.JPG
 
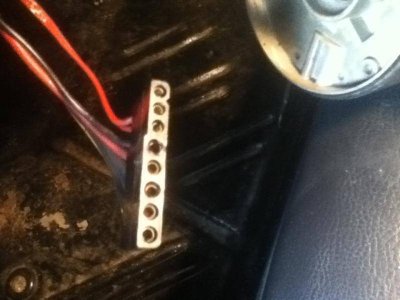
Ok people I'm having problems wrapping my head around this maybe Im too dense. (if this is repetitive forgive me but I need to start at the beginning). The problem is I don't see how this can work, even with re-configuring the RockA piece to match up with the original male end connector still dangling beneath my dashboard which is what it will need to do -- the color number order/scheme is supposed to match correct? and right now they don't PLUS again, the RA one has open slots, mine does not. There are 6 wires TOTAL on the RA, mine has 8...so what is being combined together to make up for that? 68Plymouth383 found a really nice NOS piece (thanks 68') but when you look at it, it too only has 4 occupied slots, 4 are empty. and the FSM doesn't provide much.

IMG_3058.jpg


IMG_3061.jpg


IMG_3062.jpg


IMG_3069.jpg
 
From looking at the back of your old switch it uses 6 hardwired wires. Looks like you need to remove the other 2 from the old one and transfer to the new one. The Nos switch looks like a proper coded replacement


Ok people I'm having problems wrapping my head around this maybe Im too dense. (if this is repetitive forgive me but I need to start at the beginning). The problem is I don't see how this can work, even with re-configuring the RockA piece to match up with the original male end connector still dangling beneath my dashboard which is what it will need to do -- the color number order/scheme is supposed to match correct? and right now they don't PLUS again, the RA one has open slots, mine does not. There are 6 wires TOTAL on the RA, mine has 8...so what is being combined together to make up for that? 68Plymouth383 found a really nice NOS piece (thanks 68') but when you look at it, it too only has 4 occupied slots, 4 are empty. and the FSM doesn't provide much.
 
.............here is the new part mated with the connector below the dash....yellow, blue, brown & black are connected, the rest are empty slots. Those two red & black wires hang freely, I assume they connect up in the steering column where the original red/red wired? Maybe this is a better description of the situation.

IMG_3070.jpg


IMG_3074.jpg
 
Ok people I'm having problems wrapping my head around this maybe Im too dense. (if this is repetitive forgive me but I need to start at the beginning). The problem is I don't see how this can work, even with re-configuring the RockA piece to match up with the original male end connector still dangling beneath my dashboard which is what it will need to do -- the color number order/scheme is supposed to match correct? and right now they don't PLUS again, the RA one has open slots, mine does not. There are 6 wires TOTAL on the RA, mine has 8...so what is being combined together to make up for that? 68Plymouth383 found a really nice NOS piece (thanks 68') but when you look at it, it too only has 4 occupied slots, 4 are empty. and the FSM doesn't provide much.

OK... this is easy.

First, we have to establish positions on the connector.

And... Let's ask this question first... Do the two (car and new switch connector) physically fit together. Don't worry about wires or connectors yet... Can they "click together". It will make things much easier.

Next. Establishing positions. Don't think about wires here but on the side with the yellow. That is #1 the next is #2 etc... up to 8.

#1 is yellow. That matches with the FSM. It is your start wire. That is the one that will be energized when you twist the key to start.

#2 is empty and should have the black wire in that position, Again, that matches the FSM and is the Accessory.

#3 is blue and matches the FSM. Ignition 1 wire

#4 is brown and matches FSM. Ignition 2 wire

#5 is empty and should have the red wire inserted. That is 12 volts from the battery

#6 is the ground connection. It should have a Violet color wire per the FSM in 18 gauge . I see a smaller black (?) wire. You have that wire labeled #8 on the OEM switch and #2 on the RA switch. Are these black or dark violet? (edit) I thought this was empty on the first go round. I see it's got the wires in it now.

#7 and #8 needs either of the red w/white tracers inserted. Doesn't matter which one goes where.
 
OK.. To simplify since the connectors fit. Black wire snaps in next to the yellow and red next to the brown.

Disconnect the two red w/white tracers and snap them into the new connector.
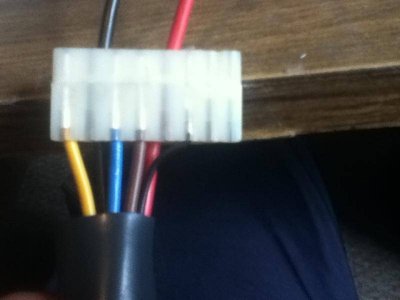
 
OK.. To simplify since the connectors fit. Black wire snaps in next to the yellow and red next to the brown.

Disconnect the two red w/white tracers and snap them into the new connector.
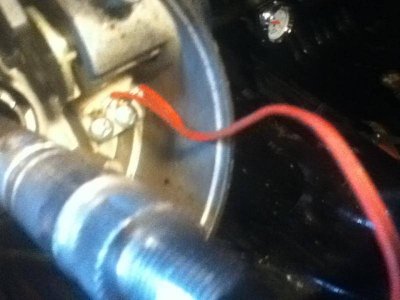
Ok so the end product will be something this?
and the old switch had two red wires going directly up and terminating in the steering column. Where are the red and White chasers? I must not be seeing that.
IMG_3076.jpgIMG_3068.jpgIMG_3066.jpg

IMG_3066.jpg


IMG_3068.jpg


IMG_3076.jpg
 
Yeah, like that. (edit.. Thought you were inserting from the wrong direction LOL)

Red w/white tracers... The tracer is the white stripe on the wire. The center picture has those two wires. They will have to be disconnected from the old harness and connector and plugged into the new one.

I'm using my 70 FSM, so maybe the wires don't have the tracers.... But the two smaller red wires on the end of the old connector. They are for the buzzer switch.
 
The connectors on the red and black wires will probably snap in, but then those two wires will be kind of long and not "neat". That's your call if you want to clip the wires and add new connectors etc.
 
Back
Top