New Member, 1967 Imperial

I knew the starter was different. I was specifically going to the mini starter because I understood it to be a better design: using less current, spinning faster, and being a longer-lasting piece. As I have mentioned several times, I don't really have an option of having the car in a non-operable, non-movable state for very long, so taking the starter out, having it rebuilt, and having the car sit without being able to move it is just not really an option. So while I was unaware that the starter could be rebuilt with higher output, I would have made the same decision. Plus, when I eventually move to dual exhaust, it will be easier to route past the smaller starter.

Regarding the alternator, the same thing applies: I have a very limited time to get the work done. If the issue is re-routing a ground wire, I'm fine with that. I just want to get confirmation that my suspicions were correct about it.

The hot start issue is unlikely to be from a buildup over time, since the carb is new, and the problem appeared early on.

Your description about the gas vaporizing and puddling makes sense. The pattern is such that if it's hot, and I just stopped it, it starts right up. It's only when it's had a chance to have the heat soak in that I have problems. I had imagined that the fuel was vaporizing out of the float bowls, and I was waiting for new gas to be pumped in, but the puddling and rich condition makes as much sense.

I'll check out the issue of the cross-over, but I don't understand how that would cause it to increase the heat. Can you explain?

This is as much an answer to your questions as it is to DetMatt's response below. The passage in the intake manifold is intended to run hot exhaust gas through the intake to speed up engine warmup. When the choke is improperly set, especially in the winter time, there's a lot of unburned gasoline that's part of the exhaust gas flowing through the intake and it settles out and slowly plugs the crossover passage. Sort of like hardening of the arteries. So while the passage is now getting more and more restricted, it's still flowing some exhaust gas and it gets all of that carbon deposits really heated up. Even if the carbon eventually blocks the passage completely, you're still going to have exhaust gas heating everything up and the carbon just acts like a heat soak, that very, very slowly gives up the heat it's accumulated. So when you've been driving for any length of time and everything is up to temperature, the engine can deal with the passage being blocked off. It can also deal with a restart from hot in a very brief period of time. But give all that heat time to boil off the gas in the carb, and you've got what you're dealing with now. All that carbon has gotten really hot, gotten the intake really hot and the carbon gives up its heat much more slowly than the cast iron would cool off, if the passage was open. Also, the lead in older gasolines helps with the plugging up. Everything else being equal, the unleaded gas won't create this mess as quickly. I know, I know, everybody hates ethanol and so do I. But your car was meant to run on premium or close to it, and modern premium gasoline has far less ethanol in it than the current "regular" grades, so once you've got the passage cleaned out, it'll stay cleaned out longer.

What DetMatt is talking about is having a manifold gasket that blocks off the exhaust passage entirely. If you lived somewhere that's warm all the time and a "cold" night goes down into the 65°F area, the car can deal with starting up in that, because for the engine that's not really "cold". But if you live somewhere where the choke stat is going to actually try and close the choke because of low temps, then you're going to have a whole new problem of the car being a ***** to start and keep running without any carb heat from that crossover passage. In cases like this, the engine will eventually warm up (it'll take a whole lot longer and you'll burn a whole lot more gas until it does) and then it will be getting the carb heat from convection coming straight up from the block.

If you're running the stock exhaust manifolds, it's crucial that the heat riser valve in the exhaust manifold is working properly. If you can turn it by hand, it's working OK. If it's stiff, you need to soak it in penetrating oil (NOT when the engine is HOT!!!!!!!!!) and work it back and forth. Also use a small hammer and tap the shaft back and forth gently to free it up. Chrysler used to sell a really, really good heat riser solvent, but the stuff made the EPA go nuts, and Chrysler had to discontinue it. I still have a little bit and only use it when really necessary. If you have a "Krown" oil spray dealer in your area, their penetrating oil works really well also.
 
Great explanation McCabe.

Joaquin I would pull that intake and block off the heat passages since you are out there in sunny San Diego. Many of the gasket kits come with the optional block off plates.
 
Fel-pro sells one the the crossover is not even punched out and of course its more money for them doing less.

Yeah, San Diego sounds like somewhere that the chokes don't get used much. It's something to consider. As for less costing more, the simple reason for that is two-fold. First somebody has to stop the machine that's punching out the gaskets and remove the part that does the heat crossover passage and replace it with a flush blank insert. Which means downtime, which costs money. Second, the manufacturer has to eat the cost of making up that blank AND, they have to amortize it over a whole lot smaller production run. I'm betting it's around 1% or less of the version with the heat crossover present.
 
...
What DetMatt is talking about is having a manifold gasket that blocks off the exhaust passage entirely. If you lived somewhere that's warm all the time and a "cold" night goes down into the 65°F area, the car can deal with starting up in that, because for the engine that's not really "cold". But if you live somewhere where the choke stat is going to actually try and close the choke because of low temps, then you're going to have a whole new problem of the car being a ***** to start and keep running without any carb heat
...
If you're running the stock exhaust manifolds, it's crucial that the heat riser valve in the exhaust manifold is working properly. If you can turn it by hand, it's working OK. If it's stiff, you need to soak it in penetrating oil (NOT when the engine is HOT!!!!!!!!!) and work it back and forth. Also use a small hammer and tap the shaft back and forth gently to free it up. Chrysler used to sell a really, really good heat riser solvent, but the stuff made the EPA go nuts, and Chrysler had to discontinue it. I still have a little bit and only use it when really necessary. If you have a "Krown" oil spray dealer in your area, their penetrating oil works really well also.

Great explanation McCabe.

Joaquin I would pull that intake and block off the heat passages since you are out there in sunny San Diego. Many of the gasket kits come with the optional block off plates.

Yeah, San Diego sounds like somewhere that the chokes don't get used much.

San Diego is nice and temperate, but it does get cool over night here. It's not uncommon to be in the low 60s overnight even in the summer. Winter lows will frequently get into high 40s, with cooler spells happening with some regularity. I know that's not cold to you guys North and East of me, but it is colder than the 65 degrees you mentioned.

I also appreciate the comment about the heat riser valve. Mine doesn't work, and it was wired open or shut, or whatever way it is when it's hot. I wasn't able to find replacement parts for it to get it working right.

I'd like to hear some more thoughts on it. Right now, in addition to the hot starting issue, it doesn't like to idle when cold. When I bought my carb, I had it installed by the seller (San Diego Carburetor) and they have a one-year unlimited "if it doesn't run right, bring it back and we'll make it run right" guarantee. The problem is that when I brought it back the first time, he found a vacuum leak right off the bat, and still made some adjustments, fixed that lead, and didn't charge me.

It's just not fair of me to try and go back and have him trace and fix all my vacuum leaks, and he'd probably say no. And I'd agree with him.

That's a long way of saying that I'm kind of living with the issue until I can get some more time under the hood to trace some vacuum issues that I suspect I'm having.

At some point, the engine is going to need to be rebuilt. At that point, I am leaning towards a mild cam, 440-source heads, Performer intake, and hi-po manifolds. I'm not sure how that fits into this discussion, but it makes me feel faster just mentioning it....
 
With the cost of vacuum line per foot I just replace all of 'um if and when I have issues, it's no big deal and if that's what the issue was It's a cheap fix and ah win win. As for the Fel-pro valley pan gasket Dave speaks of, That would be Fel-Pro# 1215 and itz the only way to fly if you're running Cross Rams. The exhaust gasses do eat aluminum if anyone doesn't know that! Most all of the balance plates that set between the runners on the side of the heads right where the exhaust port for the cross over is show the signs of some one in the 50 year history replacing the valley pan with the wrong one gasket. Any body considering an after market aluminum intake might wanna keep that in mind. Just my .02, Jer
 
As long as it is wired open I would just leave it, this and the heat stove pipe at the air cleaner are meant to keep carburetor from icing and fuel atomized at cold temps the twice a year that San Diego sees these conditions is not worth the thousands of miles driven outside these conditions. If you have suspect areas of vacuum leaks a propane soldering torch (for plumbing soldering) not lit makes quick work of finding these, you used to use ether or carb cleaner but they have screwed around with the formula on those so much I'm not sure they even burn anymore, OH and don't empty the whole little cylinder looking propane sits low against ground where the hot exhaust is, you can get a feel of how it surges your idle if you pull a vacuum hose and wave torch head by it. Be careful
 
Thanks. It's pretty dirty now, as it sits outside uncovered. It stays nicer with the cover on it, but I drive it more when it's uncovered. So I leave it uncovered!

Hard to believe I haven't posted about it since August. Not much done since then, but a few little updates:

1. Windows. I had one window (passenger rear) that was adjusted poorly, with a gap. The window still rolled down, but needed help aligning. Now it's just stopped. Same with passenger side front. Was slow, now stopped. Having fixed the driver's side, I'm not too worried, but I need to get in there.

Driver's side rear goes down with the driver's switch, but only up with the rear switch. The front switch will get it to move a little bit, so I'm suspecting bad contacts. Another small issue, but one I need to find time for.

2. Front end. I bought new tie rods and related parts, but didn't get them on in my last go-round. When I went to do it, I found I'd lost one. Now I have to figure out how to tell the difference between Left and Right and buy another one. Grrr.

3. Vacuum. Still no progress there. I just let it warm up and it drives fine. Luckily that's an option in San Diego.

4. HP Manifold! Bought a driver's side C-body HP manifold. Will keep an eye out for an inexpensive passenger-side. Part of my beginnings of collecting parts for a rebuild when the engine stops running as nicely as it does now. (440-source heads are another part of that, but I'll wait to sell some motorcycles first.)

5. Electrical. I had my battery die, and it was a mysterious drain. Because I'm a lazy bastard, rather than track it down, I put on a battery cut-off. I'd meant to do this anyway, because I work from home, and don't drive for days on end. But then I forgot to disconnect, and my battery is showing no signs of drain, so I'm thinking it was the glove box light or trunk light or something.

My wife sees the manifold in the bedroom (on my side of the bed, of course) and then saw the fender I bought, and said, "why is it that it seems like there's a secret stash of car parts around here?" I told her that manifolds on the carpet wasn't exactly secret. Not what she was getting at, but I think I deflected her.

So, in summary, the bipolar owner is on the upswing again!
 
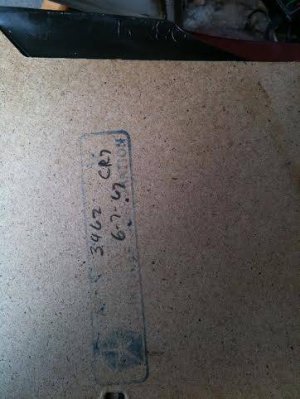
I took the day off today to get some work done on the windows. The passenger side window wasn't moving any more, so I took the door panel off and went at it. It looked really nice inside there. Might have been the first time that panel was off. Still had the original inspection marks.

Doorpanel1.jpg
Doorpanel2.jpg

This time around, I decided to drill holes in my doors to access the motors without taking out the regulators. OMFG! It is soooo much easier! I totally recommend this to anyone who is going to pull the motors to work on them. It's easy to do, and the motors just pop out. The down side is that you can't access the regulator as easily to grease it, but that's a small price to pay for not having the hassle of fitting the regulator and motor back in past the tracks.

When I got my motor out, I tested it, and it worked fine. When I took it apart, though, I was a little surprised. No pucks!

Front window gear 1.jpg
Front window gear 2.jpg
Front window gear 3.jpg

(Hmm. maybe someone has been in that door panel before....)

So I didn't need to do the nut-bushing trick. Or decide if I was going to go to Home Depot and buy some nylon ones.

It all went back together nicely and easily.

On to the back door. I forgot to take a picture of what was wrong, but it wasn't aligned properly. It stuck out at the top, and sagged at the back so it wouldn't go up all the way, and would hit the door frame when closing or opening. The switch was also on backwards. Once I got it off, I found that someone else had already done the drilling thing, but had really bad aim, and butchered it up making the holes bigger.

holes.jpg

Lame.

The good news is that the problem seemed to be that the top limit is out of adjustment, and the double roller on the front track had gone too high up and off the track. Once back down, it seemed to align just fine. I was running out of time, so I didn't try to muddle with the top limit. I'll just be careful.

Original glass, too!

windowdate.jpg

But, as long as the holes were there, I decided to take the motor out. Looks like it's not the original motor, and whatever it came out of had a different connector. They spliced them pretty short, and it was a pain to disconnect:

rearwires.jpg

This one had different internals from either of my front motors. It still had pucks, but they were much deeper in section than the driver's side front. I could see that they were starting to go, but since they were so much different in form than the nuts, I decided to put them back in with new grease.

rear puck1.jpg
rearpuck2.jpg

This door went back together with a bit more difficulty because the panel was a bit more beaten up, and the clips didn't want to stay in. But it's all back together now, and the motor works, window goes up and down. It's nice.

Last, I also "fixed" my seatbelts. My fronts were crossed over, with the driver's side bolted to the passenger's side of the trans tunnel. That made the belts shorter, and was just wrong, so I fixed them.

As long as I was doing belts, I checked under the back seat, and lo and behold! A center seat belt! I was really happy to see that. It means I can put my child seat back there, and still have seat belts for two adults on either side.

With the seat removed, I also found my broadcast sheet. I pulled it out, but haven't really looked at it yet. My wife is out of town, and my daughter was coming home from day care, so I had to go back into daddy mode. I'll try to get a nice scan of it and post it up.

All in all, a productive day. Not Vodka-quality work, but it's still nicer than when I started my day, so I'm happy with that.

Doorpanel1.jpg


Doorpanel2.jpg


Front window gear 1.jpg


Front window gear 2.jpg


Front window gear 3.jpg


holes.jpg


windowdate.jpg


rearwires.jpg


rear puck1.jpg


rearpuck2.jpg
 
Good job, now send some of that smooth sailing this way because I know I'm going to have multiple problems trying to change the rear rear pinion seal on my truck, nothing that the torch won't take care of.
 
bajajoaquin; said:
My wife is out of town, and my daughter was coming home from day care, so I had to go back into daddy mode.
When the cat's away....Nice work!
 
You put me on a high pedestal my friend ;) I really like your work, I'm always close to the proceedings when you're posting!

Do you have pictures of the holes you drilled? And what purpose do they serve?
 
Thank you. You deserve that high pedestal. I just wiped out the grease and put in new grease. You probably would have cleaned each gear with a toothpick, cleaned it back to a grease-free state, touched up the gear teeth, and then reassembled it with all the bolts lined up to match!

The holes are drilled over the screws that hold the window motors in place. Earlier in my thread,I think there's a picture of how you can see one of them through an access hole. You drill two more holes to access the other two. The head size is 3/8", so you make them fit the outside of a 3/8 socket. Enlarge as necessary to account for being slightly off center. Or get one motor out and make a template.

Then, you can unscrew those three, and the mounting screw at the bottom (not bolts, mind you, since they tighten into the piece, rather than using a nut). After unplugging the motor, you can remove it, leaving the regulator in place. The rest of the window and mounting brackets hold the regulator and spring in place.

It is waaaaaay easier than fishing everything in and out. However, for you and your car, you might want to take the regulators out with the motors, since you're probably going to want to get at them and fully clean and lube them up again. There's only limited access to the parts when they're still in the door.

Just be very careful when you take out the regulators. Before removing the motors, remember to clamp the moving pieces securely, or else when you remove the motor, you'll have the spring unwind explosively.

And thanks to everyone else for the kind words. It was nice to have a day to play with the Imp. Now I'm all fired up to get back on the rest of the long list of things to do!
 
Does anyone have any ideas about why all three motors I've inspected are different? The obvious answer is that some have been replaced over time. But what about the different gear drives? Everyone talks about the pucks disintegrating, but I've never read a solution that you go to find the puckless drive, or any question about which puck drive size you have.
 
Thanks for the description! I would've removed the old grease for sure and would recommend it to everyone else! The old wear residues are in the old grease and will increase further wear. And you are right, I will take everything out to rework it but I will definitely drill these holes for better access in the future! Great hirt!

I've read a lot about these regulators and their tendency to cut off fingers, heads or worse ;)
 
Inside the motor gear boxes, it's pretty straight forward to wipe out the old grease and put in fresh. Even I can do that! :)

The regulators are tougher. Even when they're out, because you can't disassemble them (because of the spring), you don't really have access to the moving parts. On the driver's door, where I removed the regulator, I just spayed some cleaner on them and then applied some lithium grease. On the other windows I just worked on, I stuck the spray grease in the access panel and used the other hand to point the straw nozzel at every hinge and moving part I could see. I wiped the grease off of the exposed gear train and gave it a thin coat. I then made sure that there was grease on the gear of the motor, since that's the interface.

The windows don't move quite as nicely as the driver's side, but I got two done in less than half the time it took me to do just the front. Again, if I were in your shoes, and was completely disassembling a car that had sat for a long time, I'd pull the regulators out. I probably wouldn't bother to drill the holes, though. If you're taking the regulators out, drilling the holes doesn't give you any advantage. If you have to remove the motor later, it's an additional 10 minutes to do it then. And if you're refurbishing the motors now, you may never have to go in and mess with the motors again, particularly if you use the nuts or new nylon bushings.

That's the advantage of doing it right the first time, like you are: you don't need to also take short cuts!
 
Worse?? You are wearing clothes while you're working, right Julian???
 
Inside the motor gear boxes, it's pretty straight forward to wipe out the old grease and put in fresh. Even I can do that! :)

The regulators are tougher. Even when they're out, because you can't disassemble them (because of the spring), you don't really have access to the moving parts. On the driver's door, where I removed the regulator, I just spayed some cleaner on them and then applied some lithium grease. On the other windows I just worked on, I stuck the spray grease in the access panel and used the other hand to point the straw nozzel at every hinge and moving part I could see. I wiped the grease off of the exposed gear train and gave it a thin coat. I then made sure that there was grease on the gear of the motor, since that's the interface.

The windows don't move quite as nicely as the driver's side, but I got two done in less than half the time it took me to do just the front. Again, if I were in your shoes, and was completely disassembling a car that had sat for a long time, I'd pull the regulators out. I probably wouldn't bother to drill the holes, though. If you're taking the regulators out, drilling the holes doesn't give you any advantage. If you have to remove the motor later, it's an additional 10 minutes to do it then. And if you're refurbishing the motors now, you may never have to go in and mess with the motors again, particularly if you use the nuts or new nylon bushings.

That's the advantage of doing it right the first time, like you are: you don't need to also take short cuts!

That's right. I would also go with some short cuts when my car would run and drive. But as I said before, I bought the car exactly for what I'm doing now. ;)

Worse?? You are wearing clothes while you're working, right Julian???
I do! But I lieve my cevlar shorts at home for that :D I'm just worried about my family jewelery ;)
 
Back
Top