The Sheriff

I feel that the original intent of backup lights were more to let others know you were backing up.
Even with glass lenses the ones on my 67 Barracuda are useless.Alan
I think DOT looks at it this way:
[h=4]Backup lamps[edit][/h]
Reversing lamps lit on a Mercedes-Benz SLR McLaren


To provide illumination to the rear when backing up, and to warn adjacent vehicle operators and pedestrians of a vehicle's rearward motion
 
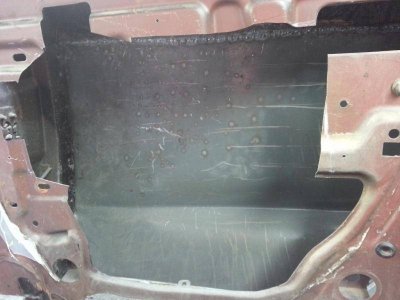
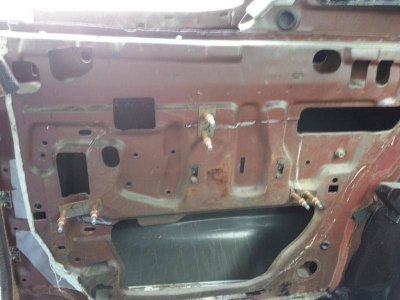
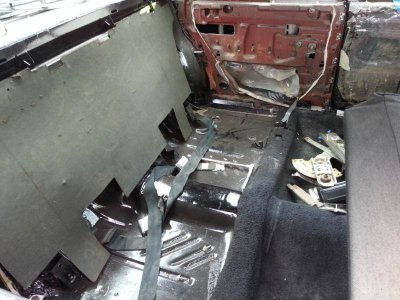
Tar about 4 inches above where I was working. You know I clean back a solid inch from where the weld was to be. My HAZ should even been that big. I didn't think they sprayed the crap that far up. I should have known based on how thick it was pumped into areas they couldn't see. A solid 1/2" was on the panel itself, above the wheel well there was almost 2 inches. They just let it fly. I'll see if I can find a pic of how thick this crap was.


I remember a few hairy Moments in collision repair with Mercedes Benz's back in the 90s. They were pumped up with wax in the Body Panels for rust protection, you had to take a good look around.
 
Ok so where are we today? Passenger front fender is straight, holes have been filled and door is smoothed/shaved, save for door handle and lock. Dealing with old damage on the quarter panel. Once the Qp was welded up I has a spot just behind the door that was low. Now, by low we're talkin' just over 1/8th inch. It's low over a 10" section. This is the area that had been hit once, looking at the older pictures one can pick it out if you're looking for it, and this was where I ground out the majority of the bondo originally.

Well so what did I do to resolve it? I tried to raise it, really I did. But finally I said f'it I wanna drive this thing some day and started to float it out. Is was coming out nice and proper. Got to the last coat I was going to lay over, and I mixed it light so I'd have more time to work out any air bubbles and have it baby butt smooth. Next morning pop out to make sure it set, nope not set yet. Waited another day, still nope. F)*&^&^%$##$^&**(())_)_!!!!!!!!!!!!!!! knowing it all had to come off now and as I'm prone to do, I went extreme and said f'it again. I went through a year of working to on the quarter to float it? mmm nope. Off it all came and back to trying to raise it. All I really did was stretch some parts of the QP. So I gave up.

Yeah I gave up thinking I could solve my issue without some advice. So I took my problem to my sounding board and the consensus was I the panel was pretty much locked in place. I should cut the through the weld at the low and see if the hip line could be raised. AYFKM? Cut? Again? More welding and grinding? AYFKM? So off we go again with the cutting wheel. once I had the slice in the QP, sure a chit the body could be moved up. The mistake was mine in not recognising it before I started tacking the QP back to the car.

I got another piece of advice, when I tack the cut back together, I need to planish it. Do what now? I can't get a dolly to the back side of the weld. There's a window and inner structure in the way. The response? Cut it out, and planish the weld, it's the fastest way to do it. Umm, I'm going to have to remove the interior to weld that back up. So, can you guess what I did? Yeah, I removed the window and tried to reach through the structure to hold the dolly one the backside. Wanna guess for how long I tried? No you don't.

So got back from my trip to bloodimore and I finally relented. Fired up the sawzall and and cut the structure out. Wow lots of access to the inside of the QP. Hey I should have done this a long time ago. The low is minimalat this point, there's light between the straight edge and the body line but so small I'm not going to bother measuring. A problem i did find was now there's highs where the metal was stretched trying to bring up that low. However having access to the back side helped with the situation. Used something called a donut dolly. Some of them are made of delrin, I used PVC pipe. It works like magic.

I got more movement and closer to the results I was looking for in 20 minutes than I had in weeeeeks. Now keep in mind I get an hour here an hour there with this thing, 4. 5. or even six hour work sessions aren't a reality in my world right now. There's a 3 year old who has the an ancestor named Adolph some where in his lineage I'm pretty sure demanding my free time. I had hoped to get the fender and door ready to go as I thought I was pretty close on the QP. Who knew. In the end still plugging away slowly dealing with my self created issues.

Tooks some time away from body stuff to replace the battery cables. Spins the big block over almost as fast as my Ram spins the 4.7,


Some day before I die.... Some day.
 
The results of removing the inner panel, slicing the quarter again, moving it where it needs to be and re-stitching. the spots all over the place are from the shrinking tip for the stud welder to finish bringing up the surface.

20141217_123119_scaled.jpg

20141217_123128_scaled.jpg


Panel that was cut out cleco'ed back in. I marked with the line first, drilled a hole on one side and placed a cleco with bridge, drilla second hole through the bridge and other side of the line and fitted a cleco. Once all three bridges were in place I removed them and cut as close as i could get to the line. So now that I'm done I just reattach the part with the cleco bridge and it's right back in place. I'll prolly get to this after christmas as I MAY actually have some time to get into the garage.

20141217_123427_scaled.jpg


And the other side for comparison.... dunno why but WTH....

20141217_123516_scaled.jpg

20141217_123119_scaled.jpg


20141217_123128_scaled.jpg


20141217_123427_scaled.jpg


20141217_123516_scaled.jpg
 
Youngin' trying to muscle in on my turf...


tj399evbd3wch0tzg.jpg


Welding up the holes that were created for the whip.

29g1bsydo5g0p8xzg.jpg


Where we ended up with the driver QP post whip weld up..

ba86o0m3wnypaprzg.jpg
 
Left over damage from some accident long gone by..

pjfhb03f28u69h0zg.jpg


I thought we might have a chance in July to make it but that aint happening now. Not with a move to FL planned... Well that and the speed at which I can really go with very limited funds..

y9r3270ip7y26yxzg.jpg
 
Left over damage from some accident long gone by..

pjfhb03f28u69h0zg.jpg


I thought we might have a chance in July to make it but that aint happening now. Not with a move to FL planned... Well that and the speed at which I can really go with very limited funds..

y9r3270ip7y26yxzg.jpg
Amazing job. If you are going to Florida and with Stan's help you will be done in no time...
 
Just so I understand, you cut that huge hole on the inside to get at the backside of the fender and then repaired the hole?

Posted via Topify on Android
 
The outside post recut and weld. Dark stuff is the epoxy primer I didn't sand all the way off. As much fun as it was taking the rapaired paint job off the epoxy was a pain in the ***. So it is what it became.

I'll get a picture of what it looks like now, entirety skimmed with filler. Been working it flat with a 30" dura block. My local paint supplier had it in stock, cheaper than Amazon. It's good to be in boat country when you're working on a boat. The middle of the door crease was brought down and forward a bit with some hammer work and the lip on the door raise up just a smidge. But it is what it is at this point and there's no going back.

I'm happy I took the time to think about how I initially finished and sanded the filler back out and brough the body line up more. Still gunna have some to flatten this big assed panel out but we're definately less than the thickness of the sheet metal now.


vn50t5djvc00nd0zg.jpg
 
Just so I understand, you cut that huge hole on the inside to get at the backside of the fender and then repaired the hole?

Posted via Topify on Android

I cut that hole on the inside so I could cut the weld on the outside again. This allowed me to bring the panel out and the body line up. The reason for the panel on the inside being cut is so I could planish the weld. You know hold a dolly on the weld and beat on it with a hammer from the outside to stretch the weld back out after it had shrunk from the welding process.

At a minute a tack, and I'll be generous and say a tack is a 1/4" of weld, the original entire weld up of the panel was 8 hours of just tacking, not counting grinding time. Slicing the thing back open just to move it a hair ove an 1/8 inch was not taken lightly. The weld up after the slice and move took near 3 hours. I don't get 3 hours to work on things here. I got a 3 yo and an impatient wife..... For me it was worth it. The inside isn't going to get the same cool down and planish. It's on the inside covered up by interior trim and there's adjustment in the bolts, shrinkage isn't going to be my issue there. Keeping it from catching fire is. :)

Oh, I have a 2 1/2" x 3/16" x 20" bar I have that's bent up and mushroomed to prove I tried to move the panel before I decided to cut. The 2lb angineers hammer and the bar had no effect. Sliced and it moved where I wanted it with hand pressure. I didn't take into account the original damage and the shrinking that would happen in that area. c'est la vie
 
Wow, you're doing some damn fine metalwork. And BTW I love the Italian stump method... that's how all those sexy race cars up to the 70s were formed, with a hammer and a stump... Also, as a welder I would like to compliment your welds. I see 100k show cars with much worse work done... Finally, get that 3 year old block sanding the bottom half of the car, I bet he'd love it and he gets to help. My 3 year old get super excited anytime I let him help work on the car, but it can be tricky sometimes to find something relatively safe for him to do, and he doesn't know all the tools yet so he's a terrible gopher lol. Sanding he had fun with tho...
 
The cars of that era were notorious for coming out of the factory with poor fit and finish. You are obviously a perfectionist. The final outcome will be better than new and will be testament to all your effort.
 
You are going to be the first person in history where the top edge at the rear of the door aligns perfectly with the top edge.of the fender.
I've yet to see one. Very nice wor... I mean... craftsmenship.

Posted via Topify on Android
 
Back
Top