You are using an out of date browser. It may not display this or other websites correctly.
You should upgrade or use an alternative browser.
You should upgrade or use an alternative browser.
The Sheriff
- Thread starter 67Monaco
- Start date
67Monaco
Old Man with a Hat
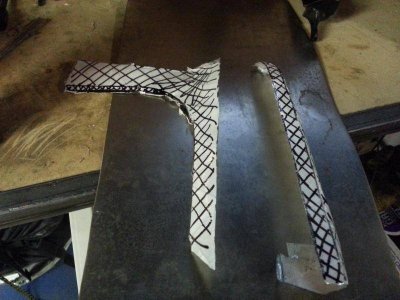
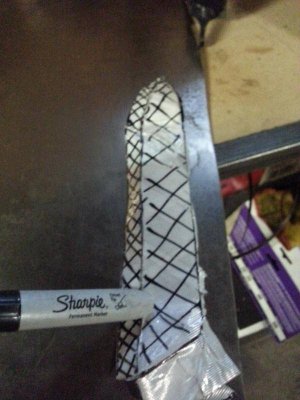
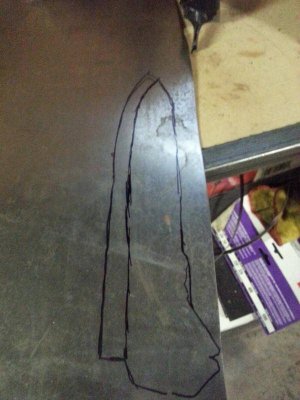
Piece cut out to rough size.
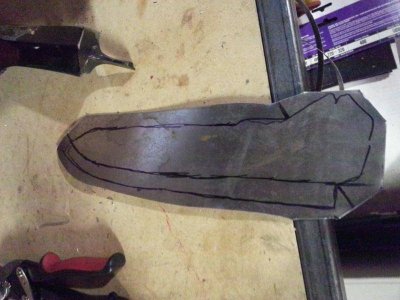
First stretching and shaping operation. the piece isn't flat, it actually has a slight bow up and down, and has a nice crown side to side. So here the piece is formed for more than what it will actually need as subsequent operations will take some of it out.
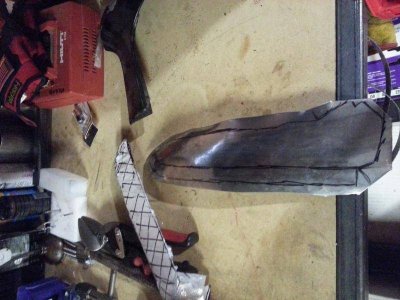
Coming in to shape.

Places I need to shrink as there's too much metal there. Wedges could be cut out and the seam welded back up but whats the fun in that?
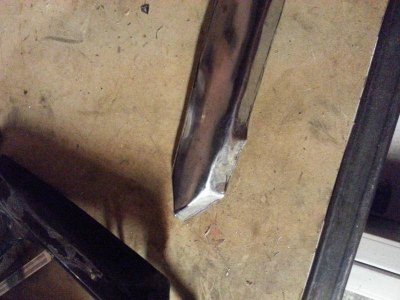
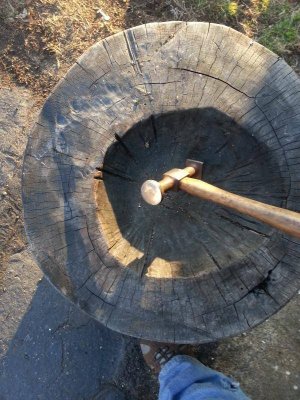
'nother shot of the basic shape. So we're pretty close here.to the shape I'm looking for however the flexible pattern shows I need more stretch in the part new the top. So at this point I went outside, put the part on the grass and beat it with a hammer to make it strech where it needed. This ended up taking forever to plannish out the lumps form the hammer stretching.
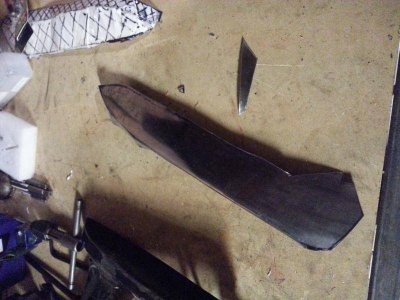


First stretching and shaping operation. the piece isn't flat, it actually has a slight bow up and down, and has a nice crown side to side. So here the piece is formed for more than what it will actually need as subsequent operations will take some of it out.

Coming in to shape.

Places I need to shrink as there's too much metal there. Wedges could be cut out and the seam welded back up but whats the fun in that?

'nother shot of the basic shape. So we're pretty close here.to the shape I'm looking for however the flexible pattern shows I need more stretch in the part new the top. So at this point I went outside, put the part on the grass and beat it with a hammer to make it strech where it needed. This ended up taking forever to plannish out the lumps form the hammer stretching.

Last edited:
67Monaco
Old Man with a Hat
So here's where we ended up today after lots of shrinking, and hammer dollie work.
In this piture you can see the bright spot in the top third of the piece, on the crown not the back rib. It's a low spot that I need to figure out how to raise without bringing more stretch with it as it has too much already, hence the low. Then there's a couple dents above that, but those should be easy to bring out.
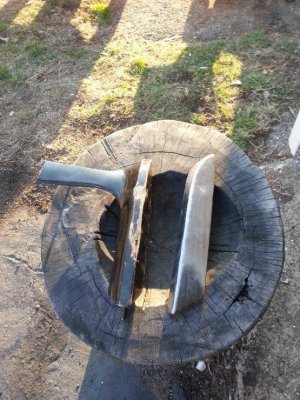
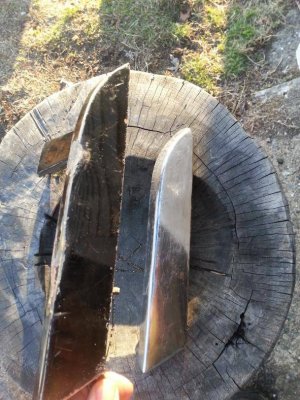
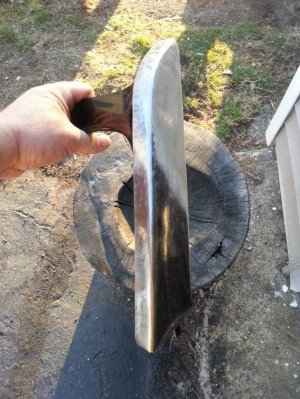
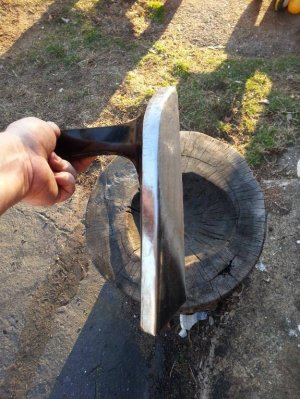


In this piture you can see the bright spot in the top third of the piece, on the crown not the back rib. It's a low spot that I need to figure out how to raise without bringing more stretch with it as it has too much already, hence the low. Then there's a couple dents above that, but those should be easy to bring out.


Last edited:
67Monaco
Old Man with a Hat
67Monaco
Old Man with a Hat
Now for the hard one. I won't final trim and shape until the second half is made. this way I can fir it all to the car. If it goes well I'll be attempting the other side and rather than bolt them in , I'll welld em for a seamless rear quarter. We'll see, it may end up a miserable failure but I did in fact learn some new things so mission accomplished as far as I'm concerned.
Sweet beautiful work.
Fratzog
Old Man with a Hat
You are quite the craftsman. That's a complex part to be making by hand. Very nice.
67Monaco
Old Man with a Hat
Thanks for the kind words but I'm far from a craftsman, I'm just a beginner. Craftsmen do things for money and I could never make money at this. It took near three hours to get this far. I've only made one part of this. The rest could end up looking like a bowl of dog doo....
oh yeah i forgot to add i had to rack my garage. Over 8 feet it was out of plum 3 inches. I used a 4 ton come along from top paste to opposite side floor plate to pull it back. I'm to about 1/2 inch out of plum over 8 feet and probably going to stop there before i bust it all to hell.
oh yeah i forgot to add i had to rack my garage. Over 8 feet it was out of plum 3 inches. I used a 4 ton come along from top paste to opposite side floor plate to pull it back. I'm to about 1/2 inch out of plum over 8 feet and probably going to stop there before i bust it all to hell.
I have always admired someone who can do this kind of work. You are a true craftsman !
That's a great job man. Now let's see a fender
67Monaco
Old Man with a Hat
That's a great job man. Now let's see a fender
I'm years away from a fender. :laughing4:
67Monaco
Old Man with a Hat
ok so just an update, I haven't given up on the trunk extension yet but I've determined that it's not do able in two pieces. Well at least with my skill set. Work on it will continue again this week as soon as I can determine how many pieces it's going to take.
67Monaco
Old Man with a Hat
So I had a bit of time yesterday and some coaching from a pro shaper and I again have some forward progress. Won't look like much here but this reverse has been the stumbling block to moving forward on replicating the trunk extension.
I have to finish this piece to shape the flat and the flanges, I have the outside formed and waiting, the last will be the inside leg. Once that's done I can weld it all together and watch it form in to origami.

I have to finish this piece to shape the flat and the flanges, I have the outside formed and waiting, the last will be the inside leg. Once that's done I can weld it all together and watch it form in to origami.

67Monaco
Old Man with a Hat
So I've finished the underlying rust issues and I've turned my attention to replacing the flanges on the quarter panel and test fitting back on the car. One thing I've wanted to do was clean off the undercoat/tar the previous people sprayed on the repair. In some places it was 3/8" thick. I used some heat to get it loose and scraped through the thick stuff a bit ago when I did the patches but I had a layer left over... SO, I set out with a spray can of WD-40 and some paper towels, and a small brass wire brush, like toothbrush size. An hour later I had the inside of the QP, the entire length, down to the factory finish or what was left of it anyway. Who knew WD-40 would cut through undercoat this quick.
Left side of the pic is the stuff I'm removing. I might try this on the underside of the car and see what happens
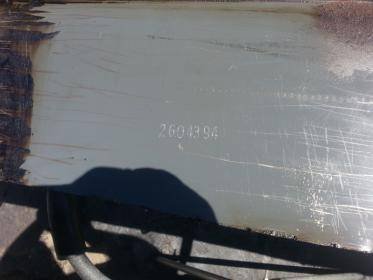

Left side of the pic is the stuff I'm removing. I might try this on the underside of the car and see what happens

67Monaco
Old Man with a Hat
A year, a whole frickin year gone.. But it's tacked. Hopefully over the next few weeks I can finish out the long weld. From the patches that had to be made, to the quarter itself and the rust found lurking in the structure underneath it's been a LONG time. Happy dance....


67Monaco
Old Man with a Hat
Learning as I go Stan. It's a ***** and probably why i take my frustrations out here on the forum.... But y'll are a resilient bunch... They tell me it'll take 20 or so years to figure it out and be any good. I say, good, hopefully I'll be 20 years older anyway so whatever I pick up along the way can't hurt.
Oh and I haven't done anything yet. I'm chomping at the bit to get this done so I can get after the transmission... Though I suspect once I finish this quarter, it's going out for a drive with whatever gears it has left.
AND I was thinking of changing the name/title from The Sheriff to Time Bandit.
Oh and I haven't done anything yet. I'm chomping at the bit to get this done so I can get after the transmission... Though I suspect once I finish this quarter, it's going out for a drive with whatever gears it has left.
AND I was thinking of changing the name/title from The Sheriff to Time Bandit.
67Monaco
Old Man with a Hat
Welp, 5' 3" of continuous weld down. Three feet left but I have a patch to do there first. Once the patch is done, I'll grind the tack on the jam and then I'll planish what needs to be planished. It's not as good as I hoped but not as bad as some had predicted. In all as it stands right now I'll have 75% less filler in it that it did on the previous repair so I'll be happy. we;ll see when it's final ground and planished, and I still have to spot weld the flanges as it's still clamped every where but the weld seam.


Hurry up.
Hurry up.
Look who's talking!!! LOL!
Similar threads
- Replies
- 33
- Views
- 4K
- Replies
- 5
- Views
- 603
- Replies
- 2
- Views
- 2K

