Automatic Tranny Leaking

Furydude

New Member
Joined
Oct 22, 2015
Messages
40
Reaction score
12
Location
Germantown MD
So just starting to work on the brakes for my 68 Sport Fury and I have an leak from the tranny. Guess I should sort that out first. It seems to be leaking from the pan and the pan seems a little beat up. I'll replace it with a new one and filter and all. Hopefully that stops it.

Dumb questions (2) When replacing the gasket, do folks recommend using any gasket sealer, or just the gasket by itself? And the manual says to drain the atf from the converter by removing the access plate and pulling a drain plug. I have never done that on other cars and not sure does it really need to be drained?

Thx for your help. Furydude.
 
I don't use gasket sealer on the pan gasket. Don't want any of the sealant to squeeze off into the pan and plugging up the valve body. I actually use a pan gasket from a 518 txsm. It's kind of that hard plastic that never leaks and it's reusable. I buy them off E-Bay pretty cheap.
 
I don't use gasket sealer on the pan gasket. Don't want any of the sealant to squeeze off into the pan and plugging up the valve body. I actually use a pan gasket from a 518 txsm. It's kind of that hard plastic that never leaks and it's reusable. I buy them off E-Bay pretty cheap.

Yup me too...A518 gasket adn filter kit. Just clean the surfaces really well and install the gasket. Think the torque on those pan bolts is about 10ft/lbs. Run the car for a day or so and recheck the bolts.

As for draining the converter....if you service the tranny regularly then there really is no need.
 
I had a leaking trans, looked like it was the pan, turned out the leak was coming from the shifter seal.
 
I had a leaking trans, looked like it was the pan, turned out the leak was coming from the shifter seal.

Most of the time, the pan gasket is fine, and the selector shaft seal is leaking instead. Feel around above the pan to establish whether there is fluid there, and if so, it is surely at least the selector shaft seal.
 
Most of the time, the pan gasket is fine, and the selector shaft seal is leaking instead. Feel around above the pan to establish whether there is fluid there, and if so, it is surely at least the selector shaft seal.
Mine took 15 mins to replace with the trans in the car, hardest part was getting on my back.
 
So just starting to work on the brakes for my 68 Sport Fury and I have an leak from the tranny. Guess I should sort that out first. It seems to be leaking from the pan and the pan seems a little beat up. I'll replace it with a new one and filter and all. Hopefully that stops it.

Dumb questions (2) When replacing the gasket, do folks recommend using any gasket sealer, or just the gasket by itself? And the manual says to drain the atf from the converter by removing the access plate and pulling a drain plug. I have never done that on other cars and not sure does it really need to be drained?

Thx for your help. Furydude.
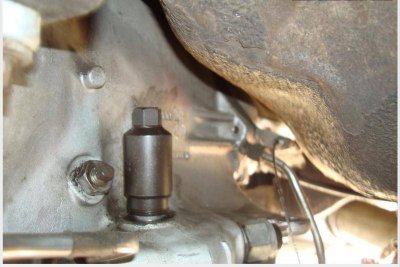
Not all cars have the Torque converter plug... something Chrysler did right... absolutely drain it because its that much more fresh fluid in and that much more old fluid out. Some quick hints for sealing a pan gasket... sealer should never be necessary, but often the pan bolts get torqued enough to dimple the pan at the bolt holes... flat is ideal, a touch the other way is ok... just tap at the holes with the peen side of a small hammer while supporting the edge of the pan on a block of wood, bench or whatever. Be extra cautious torqueing the pan back on that your very even, light torque all the way... then around again for final (still light torque, no muscle). Cork gaskets work, but are a pain because they are easy to over torque and tear...and they absorb fluid if under torqued and leak... small additional torque will cure most leaks, too much will cut the gasket. Plastic reusable gaskets are much easier to deal with... but flatten the pan holes first . Finally, with a soft gasket the corner holes will usually be made smaller to hold the bolt in, allows you to hold the gasket in place while installing. The hammer is the real trick here, deformed pan bolt holes cause many leaks. I suppose this isn't a revelation... but start all bolts a couple threads before you start torqueing.
 
Had a '64 Valiant which , one day, left a whole lot of tranny fluid on the garage floor. Turns out the shifter seal had or was failing. Had a new seal put in and no more leaks.

Glenn
 
Shift shaft seal. hmm.... ok. looking at the manual. Is the shift shaft the same thing as the gearshift control lever? The lever connects to a shaft. Up and left of the neutral starting switch?

I'll go ahead and clean all around and see where its starts leaking from.
 
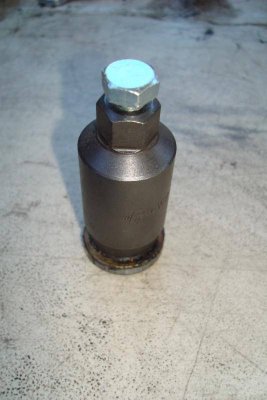
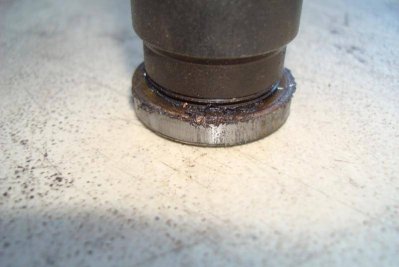
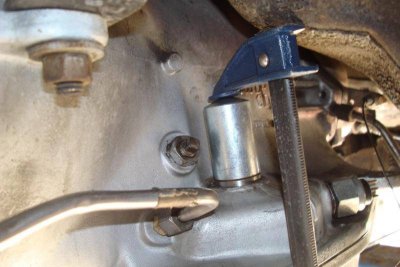
Just a couple suggestions. To replace the seal, get this tool off of ebay. It is the only real way to get the seal out in the car that is reasonable. To install the seal, use the cylindrical part of the tool and a large C clamp to squeeze it in, but be sure you do it evenly (and support the trans pan with a slim block of wood when you are clamping). You might need to leverage the removal tool to get the threads started in some cases - I use a U-shaped bar to leveage in that tight area. Do not bother with the kickdown rod very small seal in the top of the shift lever (it is held in place with an E ring - if you mess with that, then you run into the problems covered in the other reference discussion posted above). It rarely ever leaks, in fact I have never had one leak. Wait until a trans rebuild to bother with that one.

http://www.ebay.com/itm/Chrysler-Sh...:g:xU4AAOSwNSxU2k2l&item=131502819495&vxp=mtr

It is only quick and easy once you have done the job a couple times and learned the tricks. Good luck.
 
IDK that I ever used this trick on this seal, but its old school and works great IF there is enough metal collar around the seal... smallest drill bit you have, CAREFULLY drill into the seals metal part, DO NOT let the drill get into the housing or shaft... very low speeds or pulse the drill in little easy to control bursts, patience pays here. As soon as you penetrate, back the bit out turning reverse by hand...you don't want metal debris to fall in. Use a small machine screw in the hole, one that gets a good bite, but doesn't stretch the hole too much... use pliers to remove the seal dikes and a wood block give great leverage.

A 12 point socket or even a piece of pipe (iron or pvc...nothing thin wall) can be used to press the seal back in. I don't remember this seal, but have done many on many makes using this method. If I saw a flaw in this plan, I would disassemble and do it the hard way. If you buy the special tool and it fails, you can still disassemble. Don't hurt the case or shaft.

The dealer has a room full of tools, but they break and go missing without replacement...the independent garage would go bankrupt trying to buy all that... both cases this trick is often used. Tools to pry seals are often very effective at cracking cases and scoring shafts. Its not my first choice, which is to press a seal or tap a seal in and out on a fully accessible component, but it works great in a pinch.

I respect your experience but in this case, I actually tried using a drill bit like you are describing to get the seal out. The room on top is very limited to even do that. If the transmission is out of the car, then I am sure you could forego the tool. But with the trans in the car, all I ended up doing is ruining the throttle shaft when I first tried that approach many years ago. Since then, I have used the prescribed tool and never messed anything up. It is a tool I would not go without given the number of those pesky critters I have replaced. Chrysler could have done a better design on that seal. At least they could have had a double seal or something to forestall the continuous need for replacements much too frequently.
 
The room on top is very limited to even do that.

I suspected that could be a problem. Also won't work if there isn't enough metal for the hole/screw to bite. Thanks for your input, can't beat experience.
 
The more and more I look at it, the more complex it is, but that's because I have not worked on a transmission before, and I appreciate all the suggestions. On the external seals I see the shifter seal and the kick down and the pan seal. The transmissions is oily all over. The side where the shift seal is seems the cleanest. So I need to get the car up a little higher and really clean it up and then see where its coming from. It could be anything.
 
Could be leaking out of the dip stick tube "O" ring if not the selector seal.

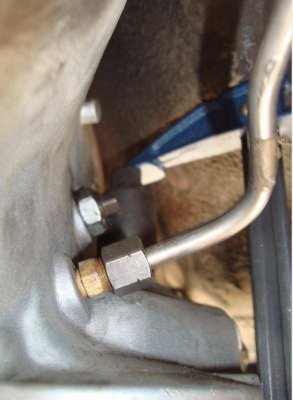
Here's some helpful pictures to follow if the selector seal is leaking using the tool saforwardlook posted.

Step 1-1.jpgStep 2.jpgStep 3.jpgStep 4.jpgStep 5.jpgStep 6.jpgtext.jpg

Step 1-1.jpg


Step 2.jpg


Step 3.jpg


Step 4.jpg


Step 5.jpg


Step 6.jpg


text.jpg
 
Back
Top