You are using an out of date browser. It may not display this or other websites correctly.
You should upgrade or use an alternative browser.
You should upgrade or use an alternative browser.
Pro-Street 66 Fury is going through a few changes.
- Thread starter AcreageAircooled
- Start date
commando1
Old Man with a Hat
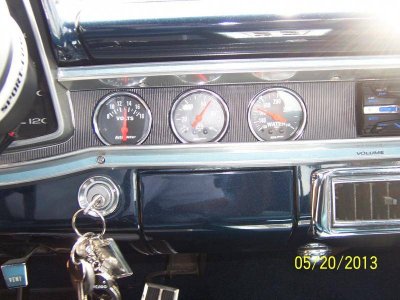
I HAVE (!!!) to know how you did that. Seriously. I need to know how you made the black surface area replacement absolutely seamless.

Even the gauge cut outs are recessed. Not simply sitting flat on top.

Even the gauge cut outs are recessed. Not simply sitting flat on top.
66SportFury
Senior Member
Henry, just noticed you don't have trunk weather stripping. Any reason for not having it in?

AcreageAircooled
Member
mcmlvii
Well-Known Member
^^^^^ wow! ^^^^
66SportFury
Senior Member
Holy carp! That is really nice Henry!
65sporty
Old Man with a Hat
Great car even the trunk looks good, you do good work
commando1
Old Man with a Hat
This blows me away.
I bet a lot of people are missing the details.
That's why people pay big money for Pimped Chariots (ahem...) rather than this car.
They can't stop for 5 nanoseconds and study the details.

I bet a lot of people are missing the details.
That's why people pay big money for Pimped Chariots (ahem...) rather than this car.
They can't stop for 5 nanoseconds and study the details.

greasemonkeyman
Well-Known Member
It's attention to details that cost big $$$. Thing don't have to be overdone,just subtle.Good job!
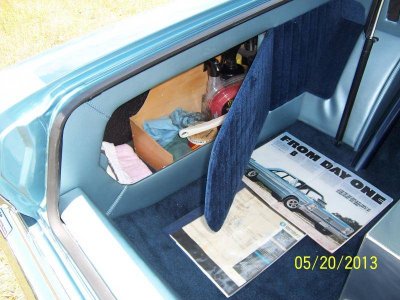
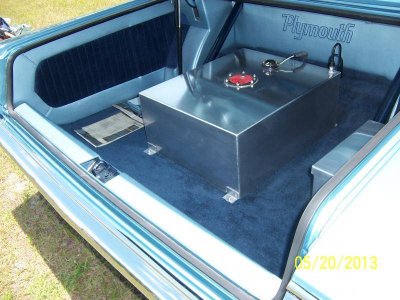
I posted that picture because I was asked about the wheel tubs or something in the trunk area, that photo was shot during reassembly. no bumper, no trim , no trunklid, etc., etc...... here is a finished trunk pic.View attachment 29687View attachment 29688
did the side panels get built with the intent to look like the tail light trim or was that a coincidence?
Dyna_rider91
New Member
This car is awesome, great work and detail too
66SportFury
Senior Member
A lot of time and thought went into this build and it shows. I love this car. I need to win the lottery to do my 66 like this..LOL.
commando1
Old Man with a Hat
Henry, you didn't answer my question on how you did the gauge panel. It looks factory!
mcmlvii
Well-Known Member
Henry, you didn't answer my question on how you did the gauge panel. It looks factory!
I've been patiently waiting also.
AcreageAircooled
Member
Stan, I thought the question was rhetorical, sorry. after removing the bezel I cut out the framed edge around the ribbed or serrated center section, then I used a several portions of the ribbed/serrated area from second dash bezel, (the right side where the heat, clock and radio are) cut, filed, fit and glued. then I cut the round openings into it for the autometer gauges. The same thing was done on the radio side. - pic: something that you may notice is the reveal or groove is painted the body color. 


cld
Active Member
So fantastic in every detail. You are a true craftsman.
That's really beautiful work aircooled
66SportFury
Senior Member
I'd say. Very nice,..oh and nice oil pressure too...LOL.
mcmlvii
Well-Known Member
Amazing details. Thanks for the explanation.
commando1
Old Man with a Hat
Similar threads
- Replies
- 5
- Views
- 232
- Replies
- 8
- Views
- 1K
- Replies
- 24
- Views
- 3K


