Resurrection of my 1970 Chrysler 300 Convertible

My advice is to make photo copies of the FSM wiring diagrams, that way you can mark wires etc while you work.

At least that's how I do harnesses following the KISS method..

You're really making me want to work on my Ragtop, I've had it 12 years in August.
Yes, that’s a great idea, especially since the FSM shows diagrams that include accessories that I don’t have like power locks and a console. Following the wires by sight gets real confusing fast.

I was just thinking about your convertible the other day. I started working on mine about the same time, I was sure you were going to be finished before me. Hobbies always take a backseat to all the other everyday needs like working, lol.
 
Does anyone have a favorite harness tape they want to recommend? I just ran out of the 1 inch shiny non-stick vinyl tape I had been using for behind the dash and I can’t remember where I got it from. I’d like to get cloth tape for the trunk harness, it’s currently a woven tube like material that is falling apart.

Here is the power window harness re-taped and ready to go. I originally thought it got tucked behind the dash, but it actually crosses under the seats and then doubles back to the hinge pillar through to the doors.

IMG_2702.jpeg


Also, what would you call these, and does anyone know a vendor than might have them? They screw to the floor and hold the harness down under the carpet.

IMG_2704.jpeg
 
Yes, that’s a great idea, especially since the FSM shows diagrams that include accessories that I don’t have like power locks and a console. Following the wires by sight gets real confusing fast.

I was just thinking about your convertible the other day. I started working on mine about the same time, I was sure you were going to be finished before me. Hobbies always take a backseat to all the other everyday needs like working, lol.
Life, especially career and family tend to get in the way and slow things down.

My wife and I are currently trying to buy another house with some land and hopefully a shop big enough to work comfortably in. That will immensely expedite my backlog of projects
 
Does anyone have a favorite harness tape they want to recommend? I just ran out of the 1 inch shiny non-stick vinyl tape I had been using for behind the dash and I can’t remember where I got it from. I’d like to get cloth tape for the trunk harness, it’s currently a woven tube like material that is falling apart.

Here is the power window harness re-taped and ready to go. I originally thought it got tucked behind the dash, but it actually crosses under the seats and then doubles back to the hinge pillar through to the doors.

View attachment 668717

Also, what would you call these, and does anyone know a vendor than might have them? They screw to the floor and hold the harness down under the carpet.

View attachment 668716
The tape is getting harder to find. Search "non-adhesive vinyl harness tape" on eBay. Here's some: 2 Rolls Factory Electrical Non Adhesive Wiring Harness Friction Tape Oem A Nos | eBay

These guys have your harness clips. Dynamic Renovation - All Mopars Nice folks to deal with too.
 
@Samplingman @Big_John and others — where did you source the pads for your convertible tops?
My top was already installed by the previous owner. IIRC, he told me the installer got the pads, but he wasn't happy with the black color. He did buy the top from Legendary, who I'll bet doesn't make the tops in house.
 
I got it off the rack of wire at NAPA, they had both types, the non adhesive tape and the friction (cloth) tape.


Alan
 
I always liked the small bumperetts and the bumpers had the holes so I’m putting them back on. Not willing to pay hundreds for NOS pieces, I decided to patch up the rubber and repaint with some satin black. I don’t remember how these came off, but getting them back on has been a challenge. Top bolts, no problem, but there is no second hole for the bottom and I can’t figure out how to position the strange looking brackets.

View attachment 667921

JB Weld Epoxy:

View attachment 667922View attachment 667923

Of course the studs broke off. Time to break out the welder.

View attachment 667924View attachment 667925View attachment 667926View attachment 667927View attachment 667928View attachment 667929

Also did some more detailing in the trunk with the new body plugs. I’m on the fence with the splatter paint, but I do have a new rubber mat from REM.

View attachment 667930
But great progress overall you made there! Really nice work!! :)
 
Took the week off, but now it’s a rainy day here in Jersey, so might as well do an update. After much testing, connecting, taping and stringing I believe I have wired the rest of the body. I have it yet powered anything up, but hopefully it doesn’t all end in one big fireball.

IMG_2707.jpeg


IMG_2708.jpeg


IMG_2709.jpeg


IMG_2711.jpeg


IMG_2712.jpeg
IMG_2713.jpeg


IMG_2714.jpeg
 
After last year’s marathon of priming and painting I found that some overspray must have billowed up into the covered dash coating the gauges. To say I was disappointed is an understatement. It did give me an opportunity to finally finish installing the glove box, ash receivers, radio and speaker. I also was able to get the clock to work! There is an excellent You Tube video on the topic. I had no idea it was a self winding clock where a set of points make contact every few minutes sending a charge to a plunger that winds the spring.


IMG_2719.jpeg


I didn’t want to risk the old plastic with solvents so I used the headlight cleaner PlastX and was impressed how easily it removed the overspray from the surfaces.

IMG_2730.jpeg
IMG_2731.jpeg


Ugh, more unfinished wiring. My son got the radio to work briefly, but we couldn’t get the seek to work. Sometime in the future I will go for the upgraded modern internals, but for now I just needed it to fill the hole in the dash.

IMG_2734.jpeg
IMG_3159.jpeg


Ash receivers from the ‘73 NYB were in perfect condition, just needed a coat of Rustoleum Flat Black topped with Clear Matt finish.

IMG_3198.jpeg
IMG_3199.jpeg


This freaking Glove Box liner! That’s all I’ve got to say on this engineering RubiX Cube.

IMG_3201.jpeg

IMG_3202.jpeg


Finally after 14 years I have a completed dash.

IMG_3668.jpeg
 
Last edited:
After last year’s marathon of priming and painting I found that some overspray must have billowed up into the covered dash coating the gauges. To say I was disappointed is an understatement. It did give me an opportunity to finally finish installing the glove box, ash receivers, radio and speaker. I also was able to get the clock to work! There is an excellent You Tube video on the topic. I had no idea it was a self winding clock where a set of points make contact every few minutes sending a charge to a plunger that winds the spring.


View attachment 683812

I didn’t want to risk the old plastic with solvents so I used the headlight cleaner PlastX and was impressed how easily it removed the overspray from the surfaces.

View attachment 683813View attachment 683814

Ugh, more unfinished wiring. My son got the radio to work briefly, but we couldn’t get the seek to work. Sometime in the future I will go for the upgraded modern internals, but for now I just needed it to fill the hole in the dash.

View attachment 683815View attachment 683816

Ash receivers from the ‘73 NYB were in perfect condition, just needed a coat of Rustoleum Flat Black topped with Clear Matt finish.

View attachment 683817View attachment 683818

This freaking Glove Box liner! That’s all I’ve got to say on this engineering Rubin Cube.

View attachment 683819
View attachment 683820

Finally after 14 years I have a completed dash.

View attachment 683821
That dash was a mother on mine too
 
Fat Mat sound deadening applied. Easy as 1-2-3, and a lot of sweat doing this during our 10th heat wave of the summer. I ran out and had to order another 10 square feet, but got it done. I spent a lot of time gathering all the correct body plugs so I didn’t want to cover them up.


IMG_3667.jpeg


IMG_3670.jpeg
IMG_3671.jpeg
IMG_3844.jpeg
IMG_3845.jpeg
 
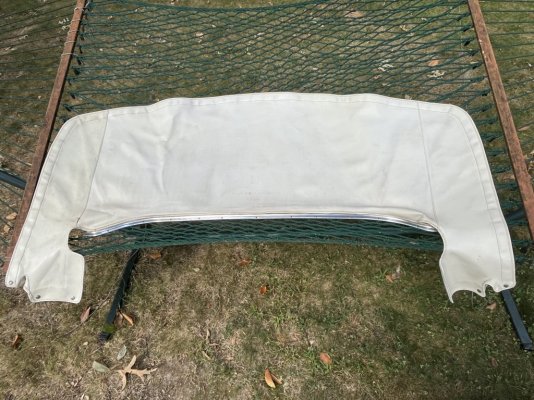
Finally got around to locating and cleaning up a number of parts for the interior. The boot had been kicking around the basement for a decade now and started to get some mold spots. In another thread @cuda hunter suggested green Dawn to wash off mold from walls and wow did that work! Also uncovered a date stamp of September 4 1969.

IMG_3932.jpeg
IMG_3933.jpeg
IMG_3936.jpeg
IMG_3980.jpeg
IMG_3982.jpeg
IMG_3983.jpeg

IMG_3985.jpeg

IMG_3986.jpeg

This was interesting. The boot must have spent too much time draped over the back seat so it was branded with the “300” from the rear speaker grill. I thought it might be a rust stain so I tried soaking in Evapo Rust, then Dawn, then Formula 409, but it is still there!

IMG_3987.jpeg
 
Last edited:
Back
Top