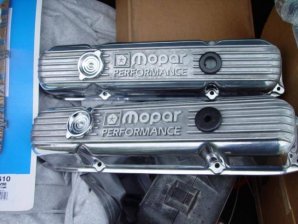
Help me spend some $$

Shes not red anymore. Spent a few hour getting the bulk of it off today. Need to pick up another can of cleaner to get the few tiny spots left.


UPS, and Fedex dropped off a few more goodies.


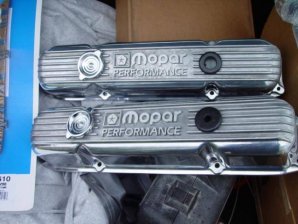
Playing/checking the new valve covers. Its gonna take some RTV to get these to seal up. Seems like a normal problem... They don't flex like the steal covers do, and with the heads not being completely straight, they have a bit of a gap at the ends... I had some new thick rubber gaskets left over from the newport to test with. Still a bit of play.

Not a good pic, but you can kinda see the space...


Has anyone here installed these on their cars? How did you go about popping the hole open for the breather, and pcv valve? I've read of people using a hole saw, and others just a hammer. The alluminum seems pretty thick there, and I don't see any relief cuts around the area.. Don't want to mess up my new covers...

I used a 1 1/4" hole saw and used a drill press to drill the holes. Make sure they are clamped securely or you'll end up with egg shaped holes. Use plenty of oil to lube and go slow. Did you order the baffles/screws you'll need after drilling the holes. I drilled all 4 holes. You'll need 2 sets. The screws are self tapping.

Mopar Performance P5007052 Replacement Baffles & Screws

http://www.jegs.com/i/Mopar+Performance/312/P5007052/10002/-1

$T2eC16F,!zQE9s3sqJHmBRR0C7)S!g~~60_35.JPG


DSC01193.jpgDSC01176.jpg

DSC01193.jpg


DSC01176.jpg
 
Last edited:
You'll need longer valve cover bolts with the thickness of the valve covers and gaskets.


DSC01347.jpg

DSC01347.jpg
 
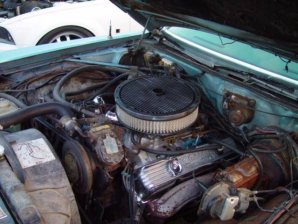
Here's a view of the other side. I didn't have any trouble with them sealing up. Was a little tight with the exhaust manifolds. Had to use 1/4" drive tools to tightened the bolts. Make sure your valve covers clear all the brackets and intake manifold. You don't want to accidentally bend the valve covers if they don't completely clear everything. I had to grind a few spots for clearance.


DSC01348.jpg

DSC01348.jpg
 
Last edited:
Bob, Thank you Thank you!!!!!!

I did not order the baffles. Now I will. I should have talked to you before I placed the order! Heres what I have-


After you drilled the holes, were you able to use the stock type grommets? I ordered stock sized grommets to go with them. The pcv grommet is on back order, supposed to have it towards the end of the month. Idk why, but I always have a hard time getting the pcv grommet. Had to reuse to original before. I figured I would have to get new bolts.. I'll just make a trip up to the hardwhare when the time comes.

The back side of the cover..

 
Ofcoarse they take a diff grommet style.. Who knew valve covers could be such a pain.

http://www.summitracing.com/parts/dcc-5249642/overview/

Just make sure you read the instructions on what hole size to use with the product you select. There are different size hole requirements for different products. I just checked the hole saw bit I used......it's 1 1/4" DeWALT. I needed both of these to do the job.

71KzhXO3VML.jpg


10479768.jpg
 
I used a new stock PCV grommet (got it from AAP in stock) and what ever grommet that came with the oil breather cap. Mine required 1 1/4" holes. Just make sure they are clamped down tight so you don't egg out the holes.
 
Last edited:
You guys are making me feel bad, watching you pull motors out, rebuild, and back in within a week. Matt that car is really coming along!!! What did you use to clean the block? Any certain chemical?

Sorry not seeing this until now, I just used a case of carb cleaner and an assortment of stiff brushes.
 
Had a few more goodies show up today..


My big block gold mine has grown quite a bit. Need some new rocker arms, and a distributor, and that should do it for the engine. Everything except the rotating assembly, and fuel pump is/will be new, or refurbished. The fuel pump looked brand new when I got it from Ross, so we'll leave it..


I believe I've got the valve covers squared away. The MP cast cover grommets showed up. From what I was reading, they can be placed in the cap holes, and work just fine. They do seem to fit them pretty good. Looks like I wont have to drill out the tabs. I also like where this would place the breather on the passenger side of the engine.


For extra insurance, ordered the MP twist on breather.


Just need to decide if I want to run the stock breather, with a hose to the air cleaner, or the one above. Thats why I like where the breather would be placed, close to the air cleaner.

 
I ordered the Mopar Grommet kit, I have these valve covers, I popped one of the knockouts out for the Breather, I wish I would not of done it. If you use the Grommets that come with the kit they will fit in the Oil Cap holes. You do not need the oil caps, Put in the Grommets in they holes and use one for the PCV Valve and the other for the Breather
 
Thanks John. Yeah, thats what I was hoping for. Dont want to drill the knockouts out if I dont need to. With the twist in breather, I dont even need a grommet. It doubles as a cap as well.

Yes sir, Bob. Have the fsm, along with a few other books out in the garage..
 
.

Yes sir, Bob. Have the fsm, along with a few other books out in the garage..

I don't know if you followed the rocker arm/shaft info on Matt's thread when he put his heads back on... the part about assembling/positioning the rockers arms so they line up with the 15 degree oiling holes properly on the rocker shaft.
 
Thanks John. Yeah, thats what I was hoping for. Dont want to drill the knockouts out if I dont need to. With the twist in breather, I dont even need a grommet. It doubles as a cap as well.

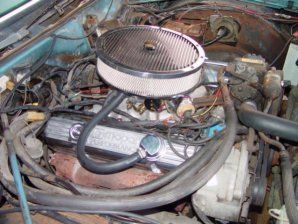
This is what I did with mine...just another option

DSC01193.jpg

DSC01193.jpg
 
I don't know if you followed the rocker arm/shaft info on Matt's thread when he put his heads back on... the part about assembling/positioning the rockers arms so they line up with the 15 degree oiling holes properly on the rocker shaft.
Even though I had my FSM sitting on the fender beside me, I ALMOST forgot about that little detail when I installed new lifters a couple months ago...I noticed I had the rocker shafts position the wrong way before torquing them down. That little detail could have KO'd my motor, glad I caught it,lol.
 
Thanks Bob.

I'll have to look into Matts thread. Will deff be following the fsm, and big block rebuild book to the tee, when reassembling.

What ignitions do you guys like? The car already has an orange box in it. Figured I'd get the MP distributor to go along with it... But open to suggestions.
 
Thanks Bob.

I'll have to look into Matts thread. Will deff be following the fsm, and big block rebuild book to the tee, when reassembling.

What ignitions do you guys like? The car already has an orange box in it. Figured I'd get the MP distributor to go along with it... But open to suggestions.

PM sent....
 
Stan, you want the ones that came off of this motor? One of them is banged up, but the other is in decent shape I believe. There yours if you want em... Ill pass on the ones above.
 
Back
Top